
Authentication
In this section, you’re going to implement signup and login functionality that allows your users to authenticate against your GraphQL server.
Adding a User model
The first thing you need is a way to represent user data in the database. To do so, you can add a User type to your Prisma data model.
You’ll also want to add a relation between the User and the existing Link type to express that Links are posted by Users.
Now we start to see even more how Prisma helps you to reason about your data in a way that is more aligned with how it is represented in the underlying database.
Understanding relation fields
Notice how you’re adding a new relation field called postedBy to the Link model that points to a User instance. The User model then has a links field that’s a list of
Links.
To do this, we need to also define the relation by annotating the postedBy field with
the @relation attribute. This is required for every relation field in
your Prisma schema, and all you’re doing is defining what the foreign key of the related table will be. So in this case, we’re adding an extra field to store the id of the User
who posts a Link, and then telling Prisma that postedById will be equal to the id field in the User table.
If this is quite new to you, don’t worry! We’re going to be adding a few of these relational fields and you’ll get the hang of it as you go! For a deeper dive on relations with Prisma, check out these docs.
Updating Prisma Client
This is a great time to refresh your memory on the workflow we described for your project at the end of chapter 4!
After every change you make to the data model, you need to migrate your database and then re-generate Prisma Client.
This command has now generated your second migration inside of prisma/migrations, and you can start to see how this becomes a historical record of how your database evolves over
time.
Your database structure should now be updated to reflect the changes to your data model.
Finally, you need to re-generate PrismaClient.
That might feel like a lot of steps, but the workflow will become automatic by the end of this tutorial!
Your database is ready and Prisma Client is now updated to expose all the CRUD queries for the newly added User model – woohoo! 🎉
Extending the GraphQL schema
Remember back when we were setting up your GraphQL server and discussed the process of schema-driven development? It all starts with extending your schema definition with the new
operations that you want to add to the API - in this case a signup and login mutation.
Next, go ahead and add the AuthPayload along with a User type definition to the file.
The signup and login mutations behave very similarly: both return information about the User who’s signing up (or logging in) as well as a token which can be used to
authenticate subsequent requests against your GraphQL API. This information is bundled in the AuthPayload type.
Implementing the resolver functions
After extending the schema definition with the new operations, you need to implement resolver functions for them. Before doing so, let’s actually refactor your code a bit to keep it more modular!
You’ll pull out the resolvers for each type into their own files.
Next, move the implementation of the feed resolver into Query.js.
This is pretty straighforward. You’re just reimplementing the same functionality from before with a dedicated function in a different file. The Mutation resolvers are next.
Adding authentication resolvers
Let’s use the good ol’ numbered comments again to understand what’s going on here – starting with signup.
- In the
signupmutation, the first thing to do is encrypt theUser’s password using thebcryptjslibrary which you’ll install soon. - The next step is to use your
PrismaClientinstance (viaprismaas we covered in the steps aboutcontext) to store the newUserrecord in the database. - You’re then generating a JSON Web Token which is signed with an
APP_SECRET. You still need to create thisAPP_SECRETand also install thejwtlibrary that’s used here. - Finally, you return the
tokenand theuserin an object that adheres to the shape of anAuthPayloadobject from your GraphQL schema.
Now on the login mutation!
- Instead of creating a new
Userobject, you’re now using yourPrismaClientinstance to retrieve an existingUserrecord by theemailaddress that was sent along as an argument in theloginmutation. If noUserwith that email address was found, you’re returning a corresponding error. - The next step is to compare the provided password with the one that is stored in the database. If the two don’t match, you’re returning an error as well.
- In the end, you’re returning
tokenanduseragain.
Let’s go and finish up the implementation.
Next, you’ll create a few utilities that are being reused in a few places.
The APP_SECRET is used to sign the JWTs which you’re issuing for your users.
The getUserId function is a helper function that you’ll call in resolvers which require authentication (such as post). It first retrieves the Authorization header (which
contains the User’s JWT) from the context. It then verifies the JWT and retrieves the User’s ID from it. Notice that if that process is not successful for any reason, the
function will throw an exception. You can therefore use it to “protect” the resolvers which require authentication.
Right now, there’s one more minor issue. You’re accessing a request object on the context. However, when initializing the context, you’re really only attaching the prisma
instance to it - there’s no request object yet that could be accessed.
Instead of attaching an object directly, you’re now creating the context as a function which returns the context. The advantage of this approach is that you can attach the
HTTP request that carries the incoming GraphQL query (or mutation) to the context as well. This will allow your resolvers to read the Authorization header and validate if the
user who submitted the request is eligible to perform the requested operation.
Requiring authentication for the post mutation
Before you’re going to test your authentication flow, make sure to complete your schema/resolver setup. Right now the post resolver is still missing.
Two things have changed in the implementation compared to the previous implementation in index.js:
- You’re now using the
getUserIdfunction to retrieve the ID of theUser. This ID is stored in the JWT that’s set at theAuthorizationheader of the incoming HTTP request. Therefore, you know whichUseris creating theLinkhere. Recall that an unsuccessful retrieval of theuserIdwill lead to an exception and the function scope is exited before thecreateLinkmutation is invoked. In that case, the GraphQL response will just contain an error indicating that the user was not authenticated. - You’re then also using that
userIdto connect theLinkto be created with theUserwho is creating it. This is happening through a nested write.
Resolving relations
There’s one more thing you need to do before you can launch the GraphQL server again and test the new functionality: ensuring the relation between User and Link gets properly
resolved.
Notice how we’ve omitted all resolvers for scalar values from the User and Link types? These are following the simple pattern that we saw at the beginning of the tutorial:
Link: {
  id: parent => parent.id,
  url: parent => parent.url,
  description: parent => parent.description,
}
However, we’ve now added two fields to our GraphQL schema that can not be resolved in the same way: postedBy on Link and links on User. The resolvers for these fields
need to be explicitly implemented because our GraphQL server can not infer where to get that data from.
In the postedBy resolver, you’re first fetching the Link from the database using the prisma instance and then invoke postedBy on it. Notice that the resolver needs to be
called postedBy because it resolves the postedBy field from the Link type in schema.graphql.
You can resolve the links relation in a similar way.
Putting it all together
Awesome! The last thing you need to do now is use the new resolver implementations in index.js.
That’s it, you’re ready to test the authentication flow! 🔓
Testing the authentication flow
The very first thing you’ll do is test the signup mutation and thereby create a new User in the database.
Note that you can “reuse” your Playground from before if you still have it open - it’s only important that you restart the server so the changes you made to the implementation are actually applied.
Whenever you’re now sending a query/mutation from that tab, it will carry the authentication token.
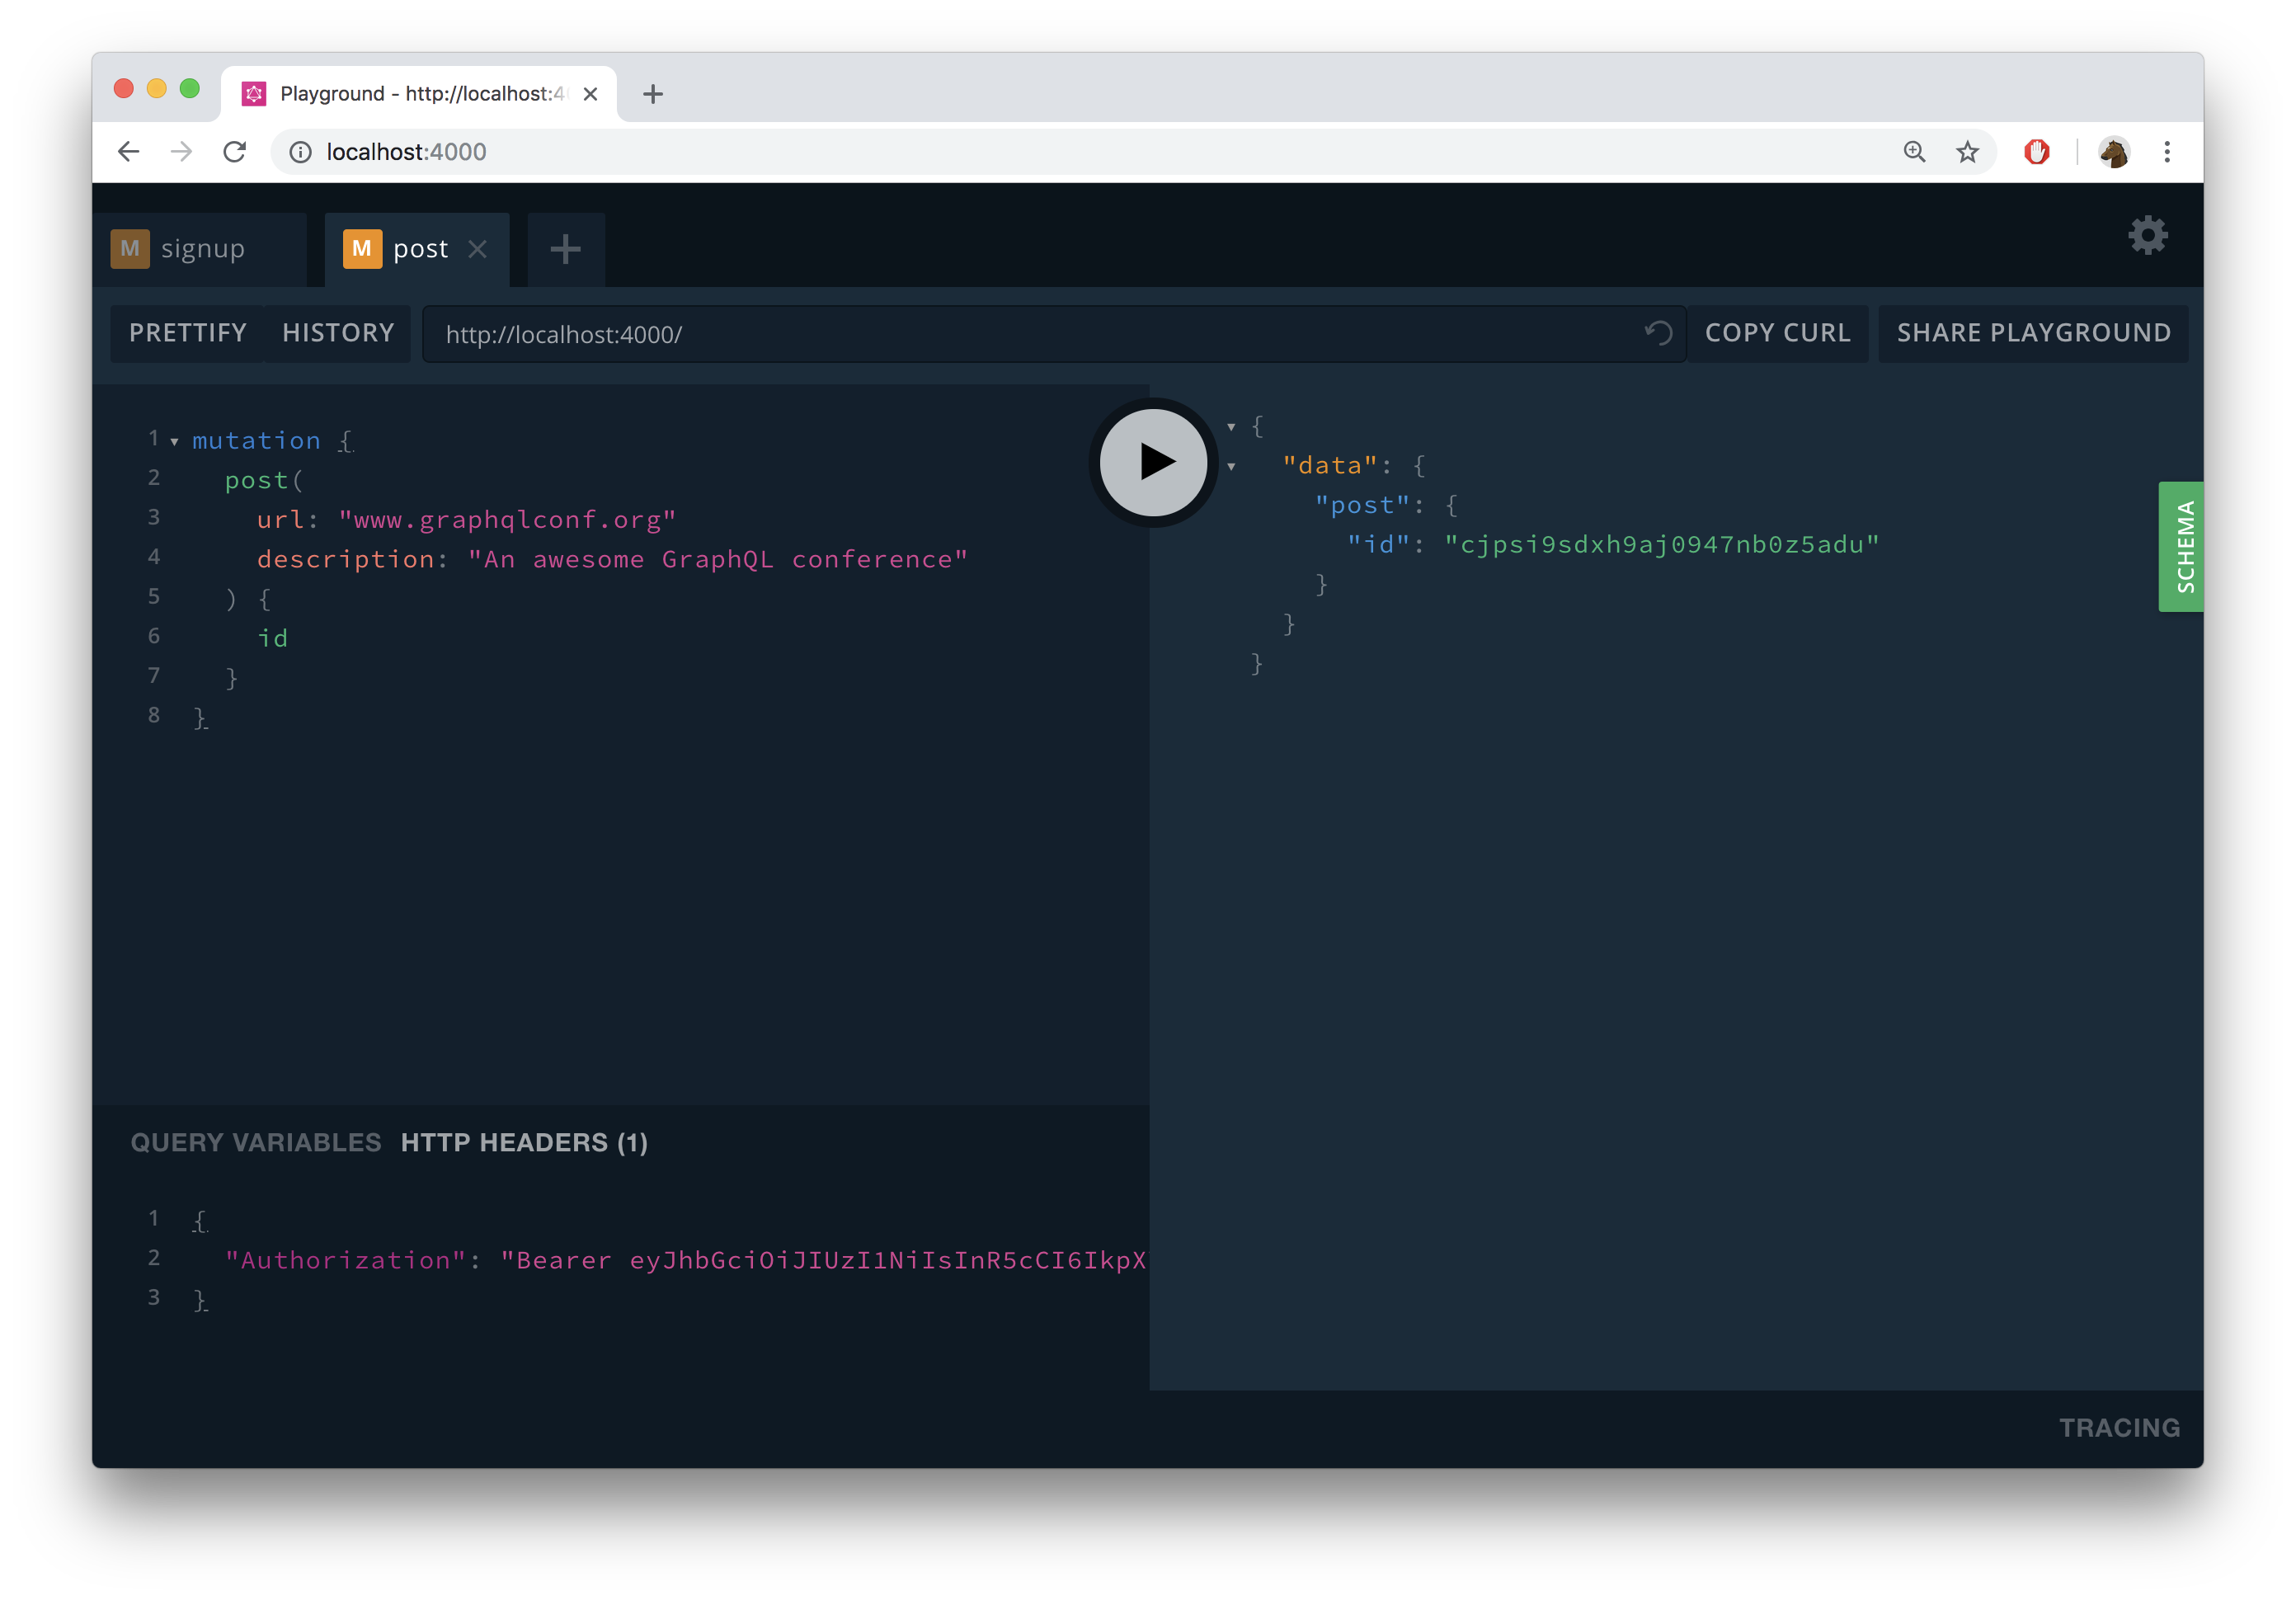
When your server receives this mutation, it invokes the post resolver and therefore validates the provided JWT. Additionally, the new Link that was created is now connected to
the User for which you previously sent the signup mutation.
To verify everything worked, you can send the following login mutation:
mutation {
  login(email: "alice@prisma.io", password: "graphql") {
    token
    user {
      email
      links {
        url
        description
      }
    }
  }
}
This will return a response similar to this:
{
  "data": {
    "login": {
      "token": "eyJhbGciOiJIUzI1NiIsInR5cCI6IkpXVCJ9.eyJ1c2VySWQiOiJjanBzaHVsazJoM3lqMDk0NzZzd2JrOHVnIiwiaWF0IjoxNTQ1MDYyNTQyfQ.KjGZTxr1jyJH7HcT_0glRInBef37OKCTDl0tZzogekw",
      "user": {
        "email": "alice@prisma.io",
        "links": [
          {
            "url": "www.graphqlconf.org",
            "description": "An awesome GraphQL conference"
          }
        ]
      }
    }
  }
}
Unlock the next chapter
Which HTTP header field carries the authentication token?
Cache-Control
Token
Authorization
Authentication
Skip